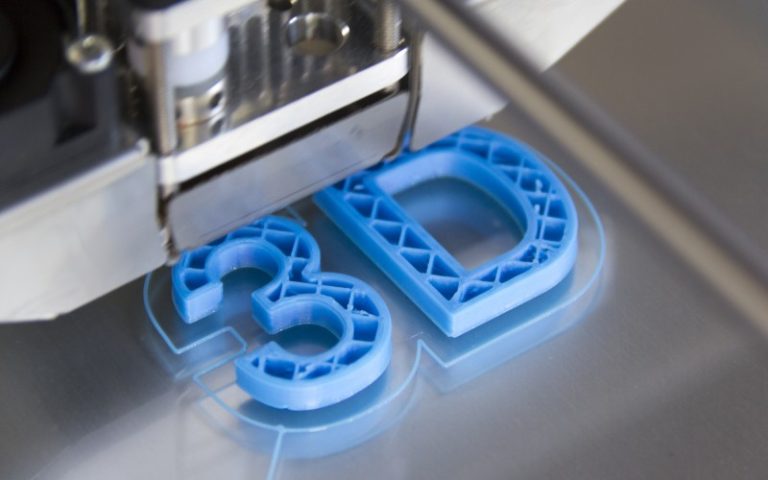
Majority of FDM 3D printers available in the market have their X and Y axes belt driven. We as users sometimes overlook the fact that the belts in 3d printers are prone to degradation with use just like all the other moving parts in the printer. In this article we will explore an issue that arises due to the degradation or failure of timing belts.
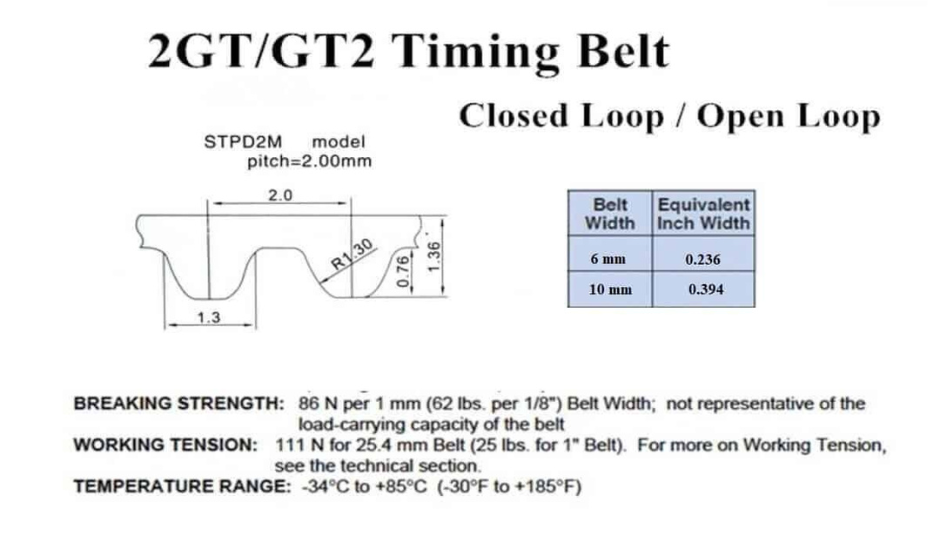
Fig.1
The most common type of timing belt being used in the majority of 3d printers is called GT2. GT2 (Global Toothed 2mm) belts (Fig.1) are one of the most popular types used in 3D printers, especially for Cartesian and CoreXY-based systems. These belts have 2 mm between each tooth (Fig.2) and are often paired with 20-teeth pulleys. GT2 belts are available in many different materials and constructions which offer their own advantages. GT2 Rubber or Polyurethane Belts(PU) are the most common type of GT2 belt being used in 3d printers. These belts are available in either non reinforced or reinforced varieties.

Fig.2
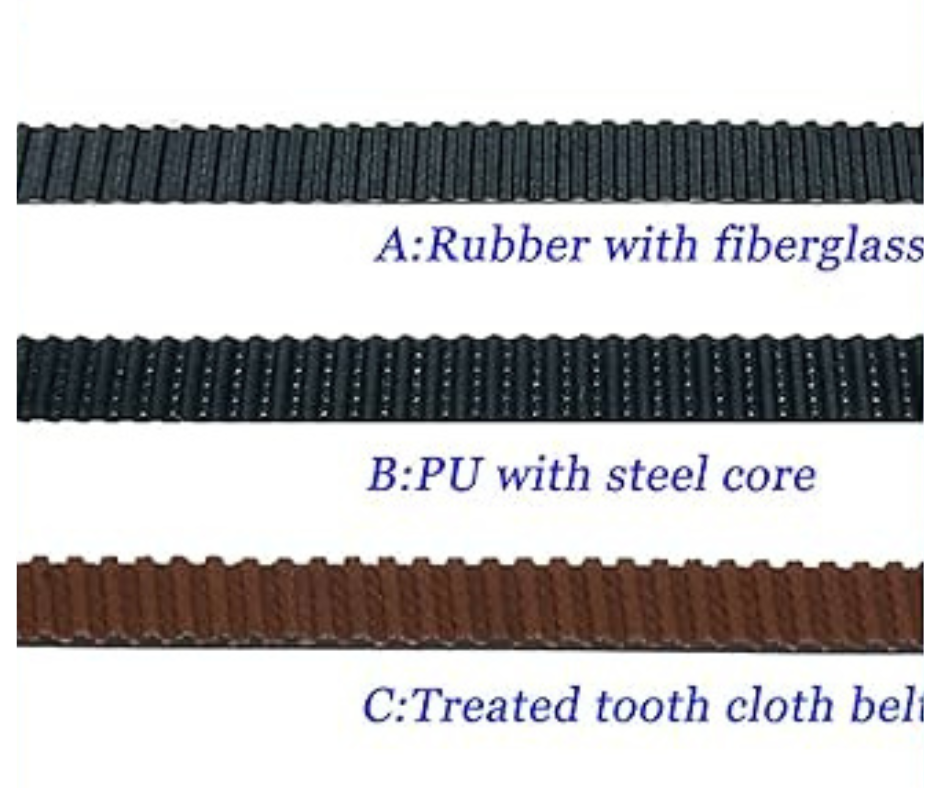
Fig.3
Reinforced GT2 belts as shown in Fig.3 consist of rubber or PU belts that have reinforcement cores made of either fibreglass, nylon or steel that run along the length of the belt as shown in Fig.4. These reinforcements provide strength, rigidity to a timing belt and makes it resistant to wear and stretching.
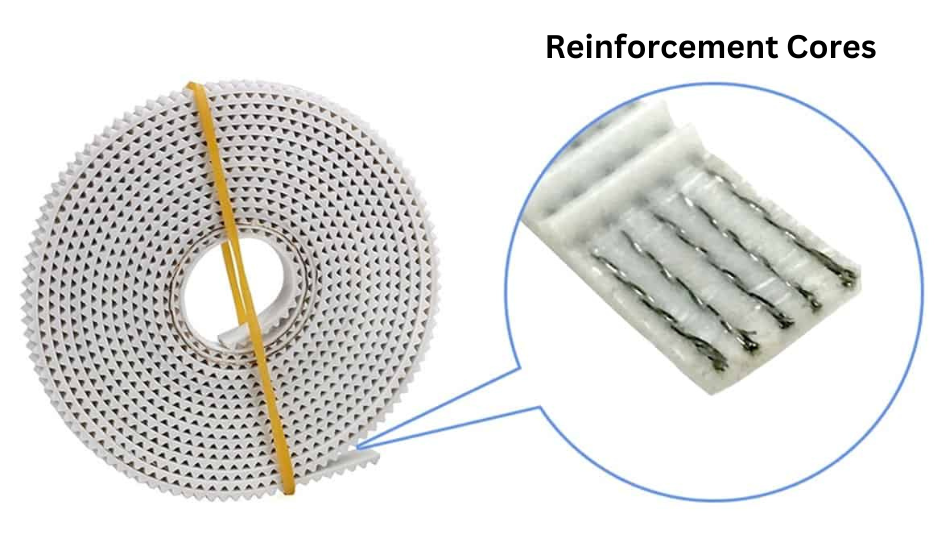
Fig.4
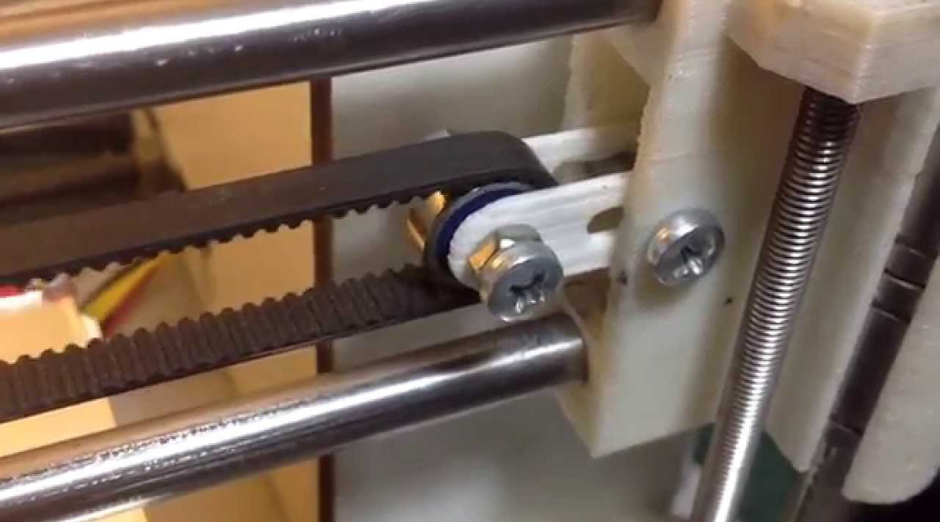
Fig.5
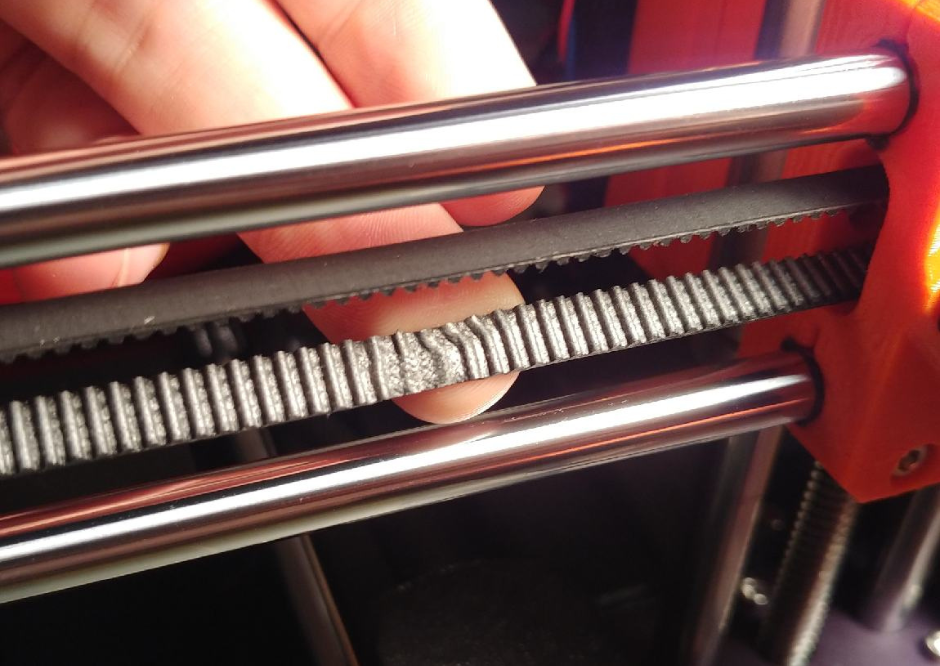
Fig.6
But regardless of reinforcement or not every timing belt undergoes wear and tear as a 3d printer undergoes use. Timing belts experience wear primarily in segments of the belt that go around a timing pulley as shown in Fig.5. Looping around a timing pulley introduces bending and pinching in a timing belt. This bending and pinching has a wear effect on a timing belt. The smaller the diameter of the timing pulley the greater the wear effect. When a timing belt starts to wear it starts to stretch at the wear point as shown in Fig.6. The stretching occurs because due to wear the material of the timing belt loses its ability to resist stretching. And the wear in a timing belt will not be uniform across the length of the belt. The segments of the belt that experience the most travel around timing pulleys will be worn out more. If someone 3D prints small objects regularly in the center of a print bed then the segments of the timing belt that are used for those prints will experience more wear and tear than other segments of the timing belt.
This non uniform wear and tear in a timing belt causes a unique issue to arise in 3d prints. The segments of a timing belt that has the most wear will stretch the most when under use and vice versa. Stretching of a timing belt under use causes its pitch to change depending on how much the belt stretches. And as the extruder head moves to different areas of the print bed the belt pitch varies non uniformly .This non uniform change in pitch causes dimensional inconsistencies in the resulting 3d prints. These inconsistencies will be more prominent in large 3d prints which cover a large print bed area. This means that in large 3d prints a larger portion of the timing belts are engaged in 3d printing. And since the pitch is changing when the belt transitions from a worn segment to a less or non worn section, the 3d print will be “expanded” or “stretched” in some areas and normal in others. So assuming that the 3d printer’s steps/mm had been calibrated when the belts were relatively new, the large 3D Printed part may be dimensionally accurate as a whole but certain small features or regions within the 3D Print will be dimensionally inaccurate. This could lead to problems especially in engineering parts where certain mounting features or holes may not line up even though the part as a whole seems fine.
This issue in particular is very hard to diagnose because of the non uniformity. A person who regularly 3D prints small parts in the center of the print bed will notice that after consistent 3D printer use, the 3D printed parts start to dimensionally expand in both the X and Y axes. To counter this the user will run a calibration print and sequence to adjust the step/mm values for the X and Y axes. This will temporarily fix the issue only for part sizes that are similar to the part used for calibration. This is because this is not an issue of miscalibration but of timing belts being worn out and stretching when under use. When the user attempts to 3D print anything larger than their normal print sizes the issue of dimensional inaccuracy will arise again because they changed the steps/mm of both axes previously.
The solution to this issue is to replace the belts for the X and Y axes and run a calibration sequence again to correct the steps/mm for these axes. A good practice is to check the integrity of timing belts in your 3D printer after every X amount of hours of 3D printing. It can be either 100 or 150 hours or in between. And it is better to replace the belts of both axes after some signs of wear have been found on either belt.
Also avoid using belts that are reinforced with steel wires. They may sound like a better choice but they are not because due to the small bending radius around the timing pulleys, the steel wires undergo a lot of pinching and eventually break as shown in Fig.7. And since the steel wires provide the majority of the rigidity to the belt, after they break the belt stretches excessively when under use.
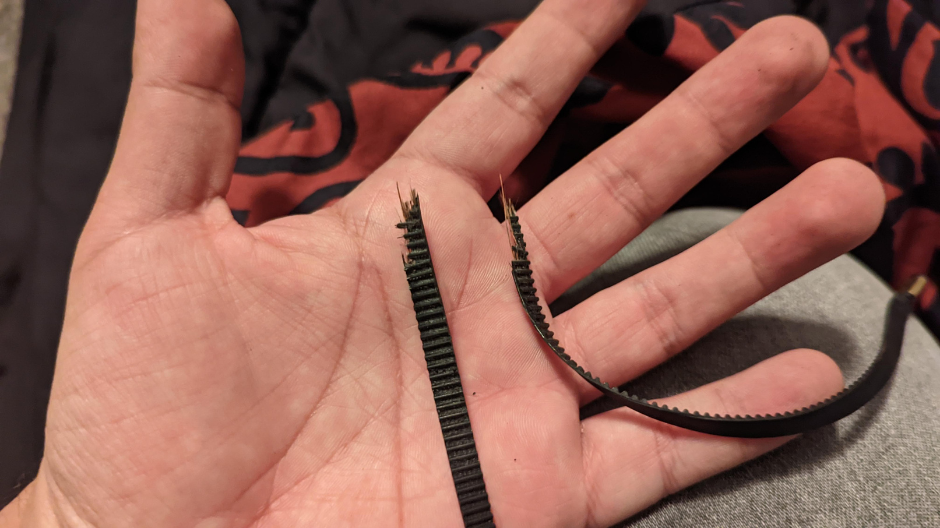
Fig.7
To recap, if your 3D prints have varying dimensional accuracy along its X and Y axes, then you need to check your 3D printer belts and replace them.